Selecting a Variable Type
Choose Variable Type
From the Form Design > Variables screen, select the ![]() button to open the Choose Variable Type dialog.
button to open the Choose Variable Type dialog.
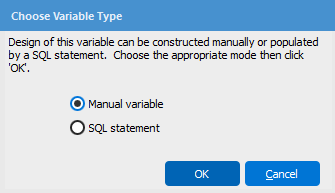
This menus allows you to specify the initial value of a variable manually or via SQL statement.
- Manual variable - manually specifies the data type and value of the variable and any sub-variables. More information on this menu can be found on the Variables page.
- SQL statement - opens the SQL editor where you can free type or use the Visual Designer to construct your query. More information specific to the SQL statement option can be found on the SQL Editor page.
Choice Entry
The Choice Entry screen can be accessed from Form Design > Properties > Choices by selecting the ellipses from within the Choices field, or by double clicking on an object within the form. Similar to the Choose Variable Type screen, the choices here are Manual entries for manual input of the data that will appear in the selected object, or SQL statement to populate the data used by the object via a SQL query.
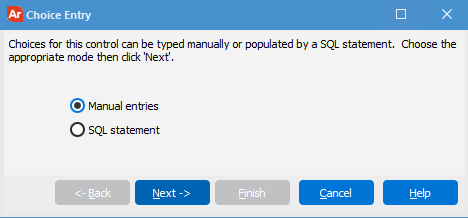
Manual Entries
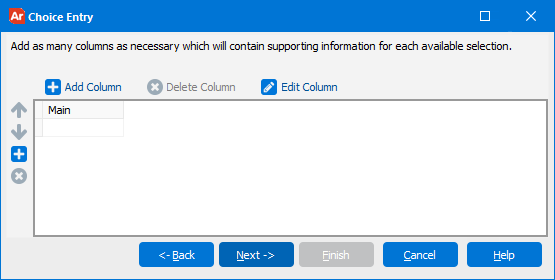
Here you can select the Add Column, or Edit Column buttons to open the Column Properties menu. To delete a column from the field, select the Delete Column button.
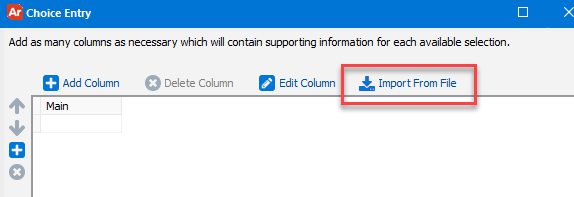
Note: when selecting Manual entries via a multi-column list box, the Import From File option becomes available. This option allows you to populate a multi-column list box with data from an imported .csv file.
Adding or editing a column opens the Column Properties menu.
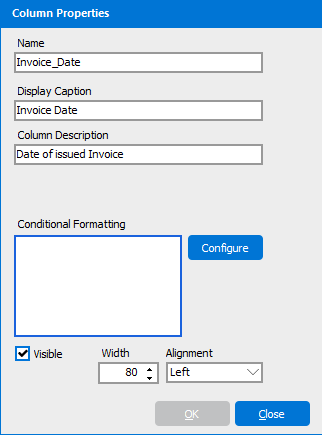
- Name - the Argos variable name.
- Display Caption - the name as it will be displayed when the DataBlock is run. If this field is left blank, it will default to the variable name.
- Column Description - a brief description of the data within the column.
- Conditional Formatting - used to add emphasis or context to the text or cells within a list box. For more information see the conditional formatting page.
- Visible - sets the visibility of the column header.
- Width - set the fixed width of the column header.
- Alignment - specify left, right, or center alignment within the cell.
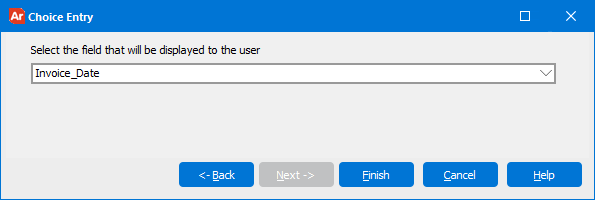
If you've manually added multiple columns to a list box, the next screen will ask you to select which field you'd like displayed in that object when the DataBlock is run.
Prompt for Data
When accessing the Choice Entry dialog via a multi-column list box, the Prompt for Data option becomes available.
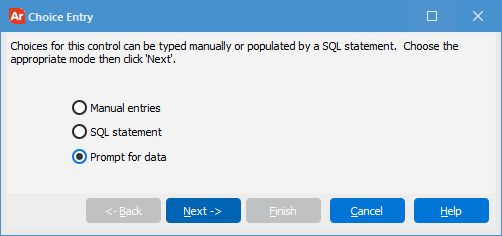
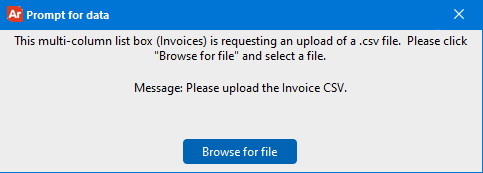
DataBlock Designers may select this option to request a .csv file be uploaded by a DataBlock runner the next time the DataBlock is run. This is useful for supplementing a query with information found outside of a typical database.
From this screen, DataBlock Designers may define the fields displayed in the multi-column list box based on a CSV file imported by the end user executing the dashboard.
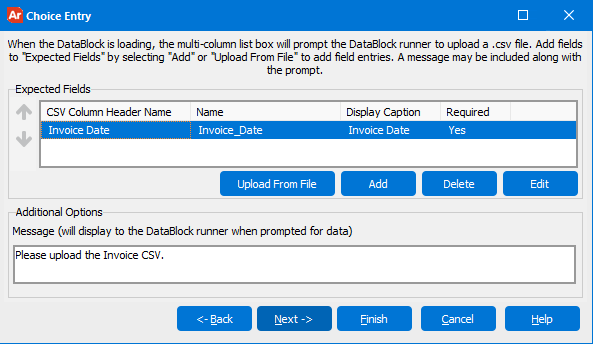
Under Expected fields, column headers can be added, deleted, or edited via the Add, Delete, and Edit buttons. Likewise, Designers can simply upload their own .csv file via the Upload from file button to auto-fill the expected header fields.
Under Additional options, a custom message may also be included. This custom message will display along with the request for data when the DataBlock is next run.
Selecting Add or Edit brings up the Column Properties menu, where more options may be configured.
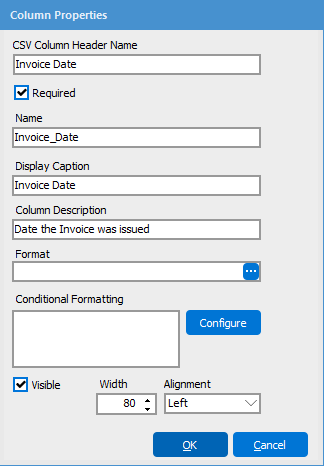
- CSV Column Header Name - the name of the column header.
- Required - check this box to mark this header as a required field in the CSV upload.
- Name - the Argos variable name.
- Display Caption - the name as it will be displayed when the DataBlock is run. If this field is left blank, it will default to the variable name.
- Column Description - a brief description of the data within the column.
- Format - allows you to apply a format mask on a numeric or date field. For example, you can change the way the date is displayed or adding dollar signs and decimals.
- Conditional Formatting - used to add emphasis or context to the text or cells within a list box. For more information see the conditional formatting page.
- Visible - sets the visibility of the column header.
- Width - set the fixed width of the column header.
- Alignment - specify left, right, or center alignment within the cell.
Next, you'll be able to preview the columns and make any further adjustments if necessary.
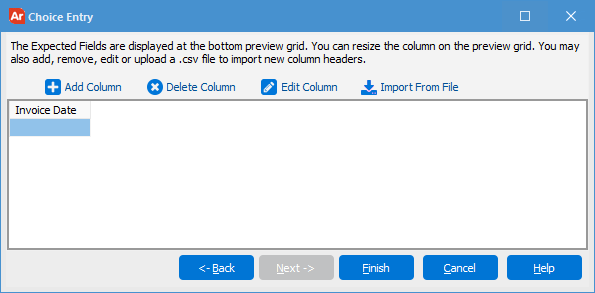
When the DataBlock is next run, the DataBlock runner will receive the following:
Missing Required Fields
When a CSV header is marked as required by the DataBlock Designer, but is missing from the prompted user's upload, the following message is produced:
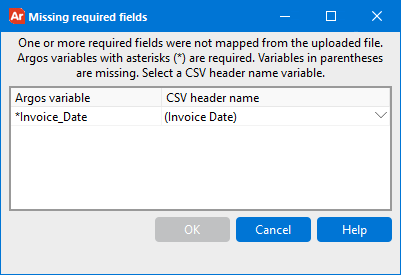
This message informs the DataBlock runner that some data could not be mapped during the .csv upload, as the header names were either missing or did not match those that were marked as required by the DataBlock Designer. Headers preceded by an asterisk in the left column are those that are required, while those that are missing from the upload are enclosed in parentheses in the right column.
In the event that your header names don't match but the data is the same, selecting the missing header on the right allows you to match it with one of the required headers and convert it into the correct header name.
Note: if a header name is not marked as required, and the intended header name doesn't match when uploaded, the value may populate in the multi-column list box as null.